Showing posts with label Birthday Cards. Show all posts

Friday, July 1, 2011

It's been a while...a long while.

Although it may appear as if I dropped off the planet, this is definitely not the case.  I have tons of pictures to share on various projects, but the problem is finding the time to actually sit down and write about them.  And not only that, but also be somewhat entertaining/amusing/ inspiring during the process. It is a lot of pressure, I tell you!! 

So, with that being said...I'm going to try harder at documenting my creative side to share with the world...or with the 3 people who MAY stumble across my blog.  :-)

Jamie had a bday, so I made her a card.  I think it turned out cute. 


I normally stay clear of bright, bold colors only because I find them intimidating.  I them, but just never feel like I fully pull them off.  Well, Jamie is a bright color kind of gal, so I had to just go with it, and honestly, I love the results!  The new 3-layer punch is so much fun and so easy to use!  Definitely a favorite.

The new catalog came out today too!  My first glance through it, I was excited on a small handful of items but by my second and third glance, my list is huge!  Looking at all the cute ideas just gets my creative side pumping!

Well, that's it from me for today.  So today is day 1 of blog recovery.  Stay tuned!!  :-)

Tuesday, August 31, 2010

Time flies....I even "celebrated" Christmas while I was gone!

I can't believe its been almost 2 months since my last post!  Life happens I guess! 

Well, I'm back and have a ton of things to share.  I may have stopped blogging for a bit, but I definitely didn't stop stamping!!  This month, I actually went to a scrap booking convention with my wonderful sister-in-law.  We spent two days being crafty and learning new techniques.  LOVED IT!

So, on to sharing a card....or two :-)

Last weekend, my dear friend Jamie (aka other friend among the crafting here on this blog who is even worse than me in actually posting a project!) invited us over for her son's birthday party.  I decided a little cash was in order, and therefore, a cash holder was needed.

At the scrap convention, I learned a fun way to fold my cards and I think I'm going to be addicted for a bit...oh well...its fun and all.  Here is the card folded up.


And here is how the card looks when it is opened.  I thought it was a perfect way to hide some $$$.


Back in July, I also had some fabulous girls over for a Christmas in July Stamp Class.  We made a few cards, decorated a candle, and made some gift tags.  We had a ton of fun.  I hope to have another class in October. 

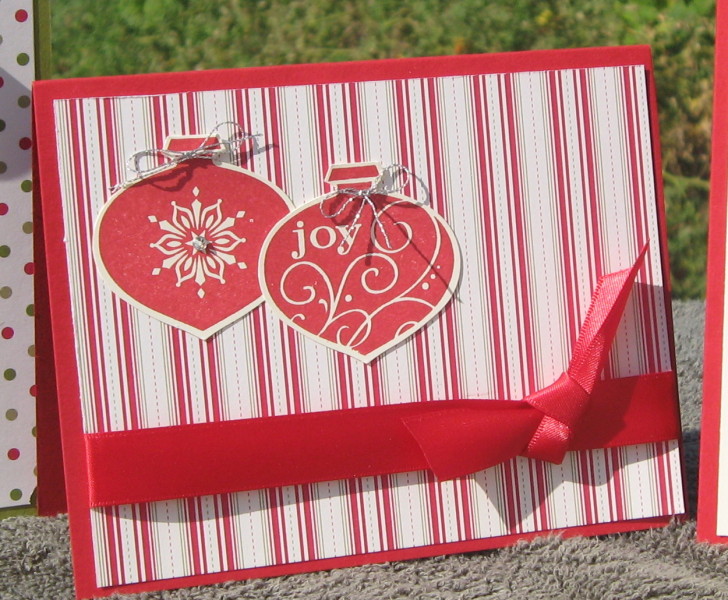
Here are the projects we made for the class.  Of course, we had to make everything with our theme in mind...Christmas!

Card #1

Card #2


Card #3


Gift Tags


I didn't take a picture of the candle, but everyone got so creative with theirs.  It was their chance to think outside the box a little.  Many included rhinestones on theirs.  They were all beautiful!

Products Used on Birthday Card:
Stampin Up Cardstock, Hostess Level 3 Stamp Set - Playful Pieces
Colors include: Crumb cake, Cherry Cobbler, Daffodil Delight, Marina Mist, Chocolate Chip

Products Used on Christmas Cards/Tags:
Stampin Up Cardstock, Delightful Decorations Stamp Set, Ornament Punch, Stampin' Up Rhinestones, Ribbon, Scallop Oval Punch, Large Oval Punch, Pop-up dots, Two Tags Bigz Die
Colors include:  Really Red, Old Olive, Very Vanilla, Crumb cake


Friday, July 9, 2010

CASE a CAS

For those not up on the lingo....CASE = Copy & Share Everything while CAS = Clean & Simple

It took me a while to realize these abbreviations were not the same thing.  One day I saw someone say a CASE'd CAS and I was beyond confused.  So, after a little searching on Mr. Google, I discovered their true meanings! 

For my club last month, one of our cards was just that, a CAS which I CASE'd from Mary Brown.


I changed up the colors and ribbon a bit, but overall it has a similar feel.  Everyone enjoyed making it.  I think the smearing of ink on card stock is such a neat technique but can be a little scary when you are first attempting it.  Basically, you just go for it and if it messes up....start over.  No harm, no foul.

I used the Four Square stamp set,  which retired last month, along with Chocolate Chip ribbon, Old Olive, Really Rust, Chocolate Chip, and Not Quite Navy card stock, and Chocolate Chip & Really Rust ink pads.

I'm working on my Christmas in July Class and hope to have some of those projects posted soon!  Stay tuned! 

Happy Stampin!

Tuesday, July 6, 2010

Black Magic in Not Quite Navy...so for me Navy Magic?

I must say, the past few days are a complete blur.  Our family surprised my mother on Friday for her 60th birthday.  Between coordinating her being out of the house, setting up tables, decorating, chopping food etc etc and serving about 100 people, the day was a long one, but TOTALLY worth it.  My mother is a total jewel and I appreciate her so much.  I know you all probably have wonderful mothers as well, but mine is just a bit more awesome than any other...ok yes, I am totally biased.

I made her a bday card using the black magic technique and of course in all the rush of things forgot to take a picture of it.  So, instead I'll share a card I made for Jamie (aka girl in the photo with me who hardly EVER blogs but I still *heart* her).  For my mom's card, I actually used black card stock but for Jamie's I felt like it would be too much contrast with the DS paper I picked out.  So, I went with Not Quite Navy. 


Steps to Create the Cuteness:
1.  Stamped the Inspired by Nature flowers using white craft ink and let dry...well..or get impatient and use a heat gun to speed up the process.
2.  Color image with SU colored pencils starting with the lighter colors and working my way out to the darker tones.
3.  Use a white gel pen to create extra highlights around the flowers and leaves/stems. 
4.  After cutting out my DS paper, flip it over repeatedly in trying to decide which side I like best. 
5.  Cut off bottom half of my stamped card stock in realizing it won't all fit on my card.  I even contemplated slicing through the whole thing to create that cool effect that some people do, but I was simply to scared to do it after all that coloring.
6.  Add a so saffron bow to make it even more cute, but I'm still not totally satisfied with how my bow tying came out.
7.  Take a deep breath, and glue it all down.

Jamie loved the card.  Mom loved the card.  I love the technique and will probably have to demo it at my next club meeting.  Oh so fun.

Happy Stampin'!!

Products Used (All Stampin' Up):
DS Paper (Retired), Colored Pencils, White Craft Ink, White Gel Pen, So Saffron Ribbon (Retired) 

Monday, June 28, 2010

MOJO Monday 144...a week late :)

I actually made this card last week as part of the MOJO Monday sketch challenge but haven't had time to blog about it.

This is the FIRST time I've ever in my entire life participated in a sketch challenge, and I give it two big red nail painted thumbs up.  What a fun way to look at my supplies and figure out how to make it work :)   I think I MIGHT be hooked....maybe...

So, here is this sketch...

And here is interpretation with my sweet hubby's birthday card that I made with my own two hands :) 


I used the new colors from SU which will be available July 1st.  I fell in love with these colors while they were in my hands, but as I used them, I realized that my fondness for their beauty was actually deeper than love...I think it may turn into obsession....and I'm ok with that :)  My picture really doesn't do these rich colors any justice....so just trust me...the yellow, the red, the blue etc etc.  GOR-GEOUS!

I used the four square stamp set which is retiring Wednesday night.  I must say, this set is actually a quiet jewel in my collection.  I ignored it over and over again only to discover it last month and realized...I kinda love her...only to find out she will be gone soon.  Oh well...I still love her.

If you would like to place a LAST CHANCE order, you need to do so by JUNE 30th.  Please go to my website at http://www.julienephew.stampinup.net/ or email me at julienephew@gmail.com .

Happy Stampin!

Products Used:
SU Card stock in Early Espresso, Daffodil Delight, Cherry Cobbler, Crumb Cake (aka Kraft), Whisper White, & Marina Mist; Whisper White 5/8 Inch Organza Ribbon, Punch Pack Set, Round Tab Punch.


Friday, May 7, 2010

A cute card for a cutie turning 2!

My niece, Jenna, turned 2 on May 1st. I can't get enough of her! She is such a wonderful mixture of sweetness and ornery and love and diva. She is such a girly-girl with her love for bling and shoes! She melts me every time I see her sweet smile....even if she hardly will say my name....

I whipped this card out quickly. I saw a similar idea from a Stampin' Up demo site and loved the way it looked. Overall, I was happy with how it turned out and equally happy that it didn't take me 2 hours to create....yes, sometimes my cards take a while...including 'whoops' moments which happen often.


I love this cardstock. It's called Raspberry Tart (#113975) and is currently available in the Clearance Rack on the Stampin' Up site. You can find it by going to my site and click on store.

I just checked today and Stampin' Up added some new items to the clearance section. Some fabulous deals for some awesome products! The paper alone makes my day!!

Happy Stampin'

Products Used:
Raspberry Tart Designer Paper (#113975)
Whisper White Card stock (#100730)
1/4" Rose Red Grosgrain Ribbon (#111366)
Small Oval Punch (#107304)
Large Oval Punch (#107305)
1-3/4" Circle Punch (#112004)

Tuesday, March 30, 2010

Birthday #3

My card today brings the birthday extravaganza in our house to a close...at least for this month. It seems like my hubby's whole family was born in the spring months....well, most of them anyway. So, I'll probably have another birthday extravaganza for April too.

So, Michael's dear, sweet mama. She loves to garden, so I figured a nature scene would fit her well.


This set from Stampin' Up is called Branch Out and is one of my favorites! Sadness that it recently retired but it will not detour my love! Hehe.

I sponged some light blues in the background to give it a little depth. Sometime was missing, so I added in a touch of sun glow with yellow ink towards middle of the card. I added a little birthday sentiment to the inside by stamping it on the polka dot paper and adhering it to my card stock. I almost messed up ROYALLY in my placement of the paper. I small shriek came out when I realized that I started to glue it horizontally instead of vertically. Thankfully, I was using some repositionable glue. THANK HEAVENS!!

Products Used:
SU Decorative Paper
SU Whisper White Card stock
SU Chocolate Chip Ribbon
SU Inks & Markers

Sunday, March 28, 2010

Birthday #2

Yesterday was Shelby's 15th birthday. It seems crazy to think our "little" girl is going to be driving soon. Shelby had some friends spend the night. Her main request was to eat at Taco Bell (so love the girl for unknowingly protecting my pocketbook!) and "hang out" at Wal-mart. I told the girls I was fine with the whole Wal-mart hang out deal as long as they didn't do anything that would cause them to get kicked out. They responded with, "Ok, I guess no hide 'n seek." Seriously???

So, on to the card....


I tried to keep the card somewhat simple and avoided pink. Lately, I've been using a ton of pink and turquoise in my cards, and Shelby just ain't much of a pink kind of girl. I wasn't sure how her card would turn out, but was pleasantly surprised with it all came together.

Next card I'll be sharing is for my mother-in-law's birthday. I'm so, so, so happy with how it turned out. You know how sometimes you look at a creative project and just go "...ya...I made that..." with a hint of pride? Well, that was my moment. I'll post the pic tomorrow.

I'll close this post with the ever poetic words of Casey Kasem "keep your feet on the ground and keep reaching for the stars".....ya, I'm not quite sure what it means either.

Products Used:
Gina K Stamp Set
SU Punches
SU Decorative Paper
Random Red Ribbon
SU Whisper White Card Stock
SU Markers
SU Watercolor Pencils
SU Blender Pens

Wednesday, March 24, 2010

Birthday Extraveganza

My kids birthday's are both in March....a week a part....well...6 years and a week. Luckily, they have gotten used to celebrating birthdays together. Its difficult getting families together two weeks in a row!

So with birthdays, of course I had to make cards! I tried to make Austin's as ungirly as possible. He opened the card with the response of, "COOL!" So, I guess I accomplished my goal. :) Here is a pic of the card.


And a picture of the birthday and his goofy grin.


I think he had a great 9th birthday including a surprise party and a sleepover with his best friend.

I'll save Shelby's card for my next post since the gal technically hasn't had her birthday yet.

Products Used:
Random Decorative Paper
SU Whisper White Card Stock
SU Inks & Markers
SU Greets, Earthlings Stamps
Light Green Brads
Corner Punches

Tuesday, February 23, 2010

Quick Birthday Card

Today is one of my college roomie's birthday. Since I'm a total procrastinator, I made a card yesterday during my lunch break. It had to be mailed yesterday so hopefully she gets it today.

I started with a decorative notecard that I picked up at our local Hobby Lobby. Then cut out some matching cardstock using my Spellbinders Nestibilities (love love love these!) and used Gina K's stamp set to give it a girly touch. Added some bling and used SU inks around the edges of the squares for depth. Something seemed to be missing, so I added a touch of SU ribbon.


So, Happy Birthday Lisa!! I hope it is filled with tons of cake and love!